Video filters
How are the video filters used in the live streams?
Video filters are powerful tools that can enhance the quality and creativity of your live stream. Using video filters in live streaming can help you create a more engaging, visually appealing stream that keeps your audience coming back for more. Whether you’re correcting lighting issues, adding creative effects, or conveying a specific mood, video filters are a powerful tool that can take your live stream to the next level.
You can adjust details such as colors, brightness, and contrast to transform your raw video feed into a polished, professional-looking stream that captivates your audience and adds atmosphere. For example, a warm color temperature filter can create a cozy and inviting vibe, while a cool filter can create a more serious or professional tone.
It’s important to note that while video filters can be a valuable tool in enhancing your live stream, it’s important not to overuse them. Using too many or using them inappropriately can make your content look unprofessional or gimmicky. As with any creative tool, moderation and a keen eye are key.
How to set up video filters in Streamster
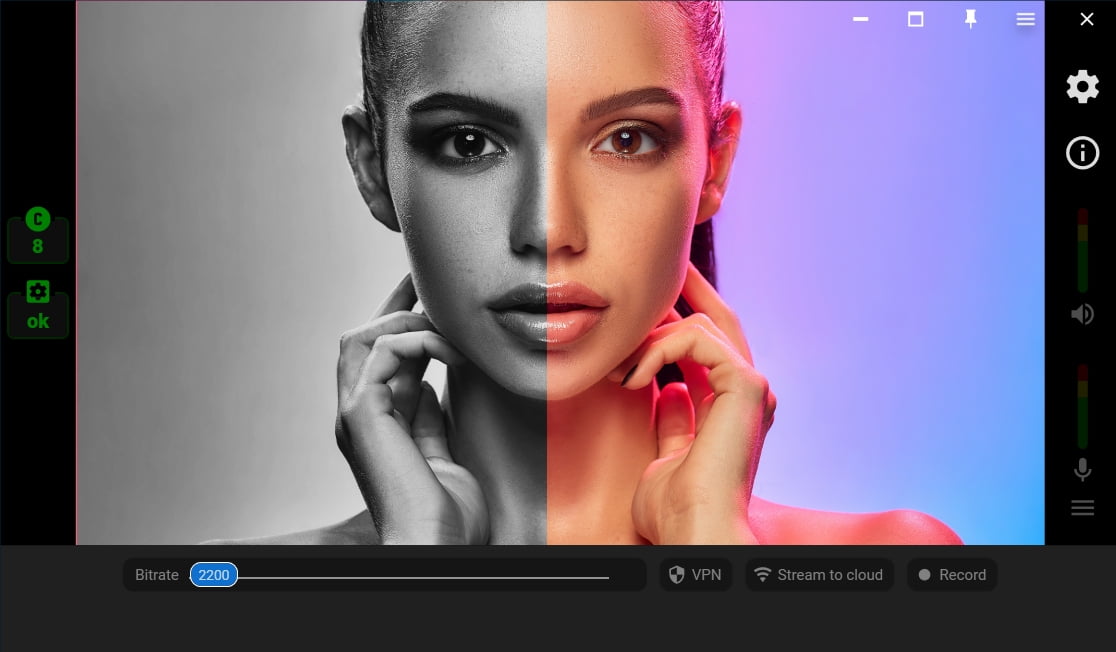
Setting up video filters in Streamster is quick and easy to do. You can apply them to any layer in the Streamster Desktop app, most commonly with the web camera video source.
You can…
Choose from various preset filters that have been divided into categories
Upload a custom LUT filter
Apply several filters to the same layer
Adjust the intensity of each filter
Upload a custom LUT filter
Apply several filters to the same layer
Adjust the intensity of each filter
Streamster Basic filters
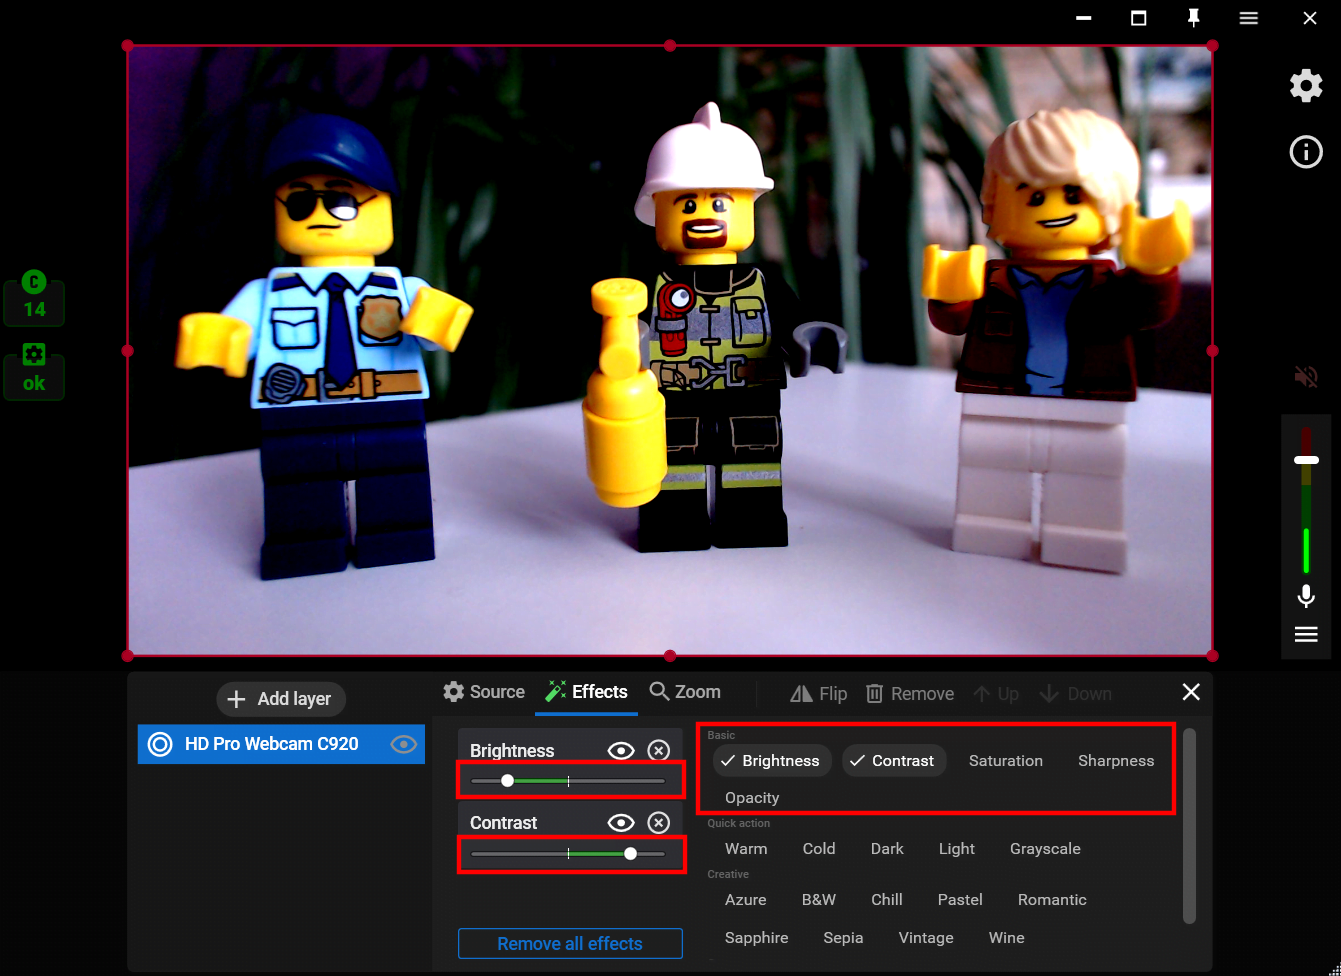
The Brightness filter adjusts the overall brightness of a video by increasing or decreasing the luminance levels of each pixel in the image. This can be useful for correcting lighting issues in a video such as when the video is too dark or too bright.
The Contrast filter adjusts the difference between the lightest and darkest areas of a video by increasing or decreasing the range of luminance values in the image. This can be useful for correcting issues with the overall tone of a video such as when the image appears washed out or lacks definition.
The Saturation filter adjusts the intensity of the colors in a video by increasing or decreasing the amount of color in each pixel. This can be useful for correcting issues with the color balance of a video such as when the colors appear dull or washed out.
The Sharpness filter is a video filter that enhances the perceived sharpness and clarity of a video by adjusting the edges and contrast of the image. It can be useful for a variety of purposes, such as enhancing the detail and clarity of a video, improving the legibility of text and graphics, and creating a more striking visual impact. You can also use it creatively to achieve a specific look or style, such as a stylized or dramatic effect.
The Opacity filter adjusts the transparency of a video or image by controlling the degree to which it is visible or hidden. This can be useful for a variety of purposes, such as creating fade-in or fade-out effects, superimposing one video or image on top of another, or blending multiple video or image layers together. You can also use it creatively to add a layer of visual interest or complexity to a video or image by partially obscuring certain elements.
Streamster Quick action filters
The Warm filter is a color temperature filter that adjusts the color balance of a video to create a warmer, more yellow/orange-tinted appearance. It can be useful for correcting issues with the color balance of a video, such as when the colors appear too cool or blueish.
The Cold filter is a color temperature filter that adjusts the color balance of a video to create a cooler, more blue-tinted appearance. It works by shifting the color temperature of the video towards the cooler end of the spectrum, typically by increasing the amount of blue and decreasing the amount of red and green in each pixel.
The Dark filter is a filter that reduces the overall brightness of a video, creating a darker and more shadowed appearance. It can be useful for creating a moody or atmospheric effect in a video, particularly for scenes that are intended to be dark or shadowy or used creatively to highlight specific areas of a video or draw attention to particular elements by creating a contrast between light and dark areas.
The Light filter is a filter that increases the overall brightness of a video, creating a lighter and more illuminated appearance. It can be useful for correcting videos that are too dark or for brightening up specific scenes or elements of a video and used creatively to create a bright and airy atmosphere in a video, particularly for scenes that are intended to convey a sense of openness or lightness.
The Grayscale filter is a filter that removes all color information from a video and displays it in shades of gray. You can use this to emphasize the contrast and texture of an image, create a vintage or nostalgic effect, simplify the visual information in a video or to convey a particular mood or emotion.
LUT filters
A LUT (Look-Up Table) filter is a type of video filter that is used to adjust the color and tone of a video by mapping input colors to new output colors based on a predefined color grading look. They’re typically used by professional video editors and colorists to apply a consistent color grading look across multiple video clips and can also be applied to live streaming video.
LUT filters can also be used to…
Adjust the color balance and temperature
Create a specific mood or atmosphere
Emphasize specific colors or tones
Achieve a variety of visual effects from vintage film to futuristic sci-fi
Create a specific mood or atmosphere
Emphasize specific colors or tones
Achieve a variety of visual effects from vintage film to futuristic sci-fi
It’s worth noting that LUT filters should be used judiciously and with care, as they can significantly alter the visual appearance of a video and may not be suitable for all types of content or contexts. Additionally, LUTs are typically designed to work with specific types of video footage or camera settings, so it’s important to choose the right one for the specific needs of your unique video project.
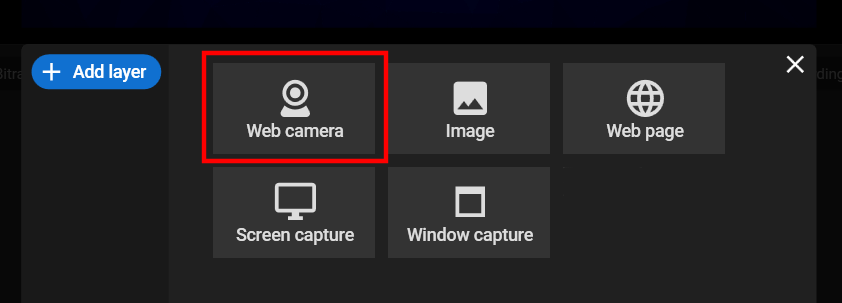
1. Add your video source by clicking the “Add layer” button.

2. Choose the “Web camera” video source and select the needed camera from the list of available devices.
3. Click the “Effects” tab to see the list of available filters.
4.1. Select one of the basic filters to change the levels of Brightness, Contrast, Saturation, Sharpness, and Opacity.
4.2. Select one of the quick action filters to make your video warmer / colder / darker or lighter.

4.3. Choose one of the preload Streamster LUT filters. Change filter opacity if needed.

4.4. Upload your custom LUT filter in *png or *cube format by clicking the “Add LUT” button.

If needed, discover our video guide about using video filters in the Streamster desktop app.