How to Live Stream on YouTube: Beginner Guide
How to Live Stream on YouTube: Beginner Guide
Set up YouTube streaming without stress.
Live streaming has become increasingly popular in recent years, and YouTube is one of the most popular platforms for streaming live content. Live streaming on YouTube allows creators to connect with their audience in real-time, and it provides viewers with a unique and engaging experience. In this beginner guide, we will cover the steps required to live stream on YouTube from a desktop computer.
What is YouTube live?
YouTube Live is a feature of the YouTube platform that allows users to stream live video content to their audience in real-time. With YouTube Live, content creators can engage with their viewers through live chats, Q&A sessions, and other interactive features. The platform can be used to broadcast a wide range of content, such as events, concerts, gaming, sports, news, and educational content. YouTube Live provides a powerful tool for content creators to connect with their audience and build their brand, while also offering viewers an opportunity to participate in and share experiences with the creator and other viewers in real-time.

Step 1: Set up a Youtube account
Create a YouTube channel if you haven’t already. You can do this by signing up for a Google account and then creating a YouTube channel.
Verify your YouTube account. To be able to live stream, you need to verify your YouTube account. This involves providing your phone number and receiving a verification code from YouTube.
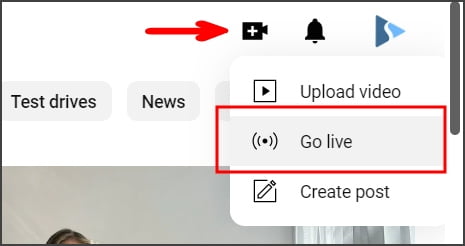
Enable live streaming. Once your account is verified, you need to enable live streaming. Go to your YouTube Studio dashboard and click on the “Create” button in the top right corner. Then select “Go Live” from the dropdown menu. If you haven’t enabled live streaming before, you will be prompted to enable it.
Step 2: Download and Install Streaming Software.
To live stream on YouTube, we recommend using a streaming software installed on your device. There are many different streaming software options available, but some of them are OBS Studio, Streamster, Streamlabs OBS, and XSplit.
Step 3: Set Up Your Stream
Now you need to set up your stream. This involves creating your stream scene and configuring your broadcast settings.
To set up your stream, follow these steps:
1. Link your streaming software to your YouTube account. Do it by connecting your software to Youtube or using the Stream Key. Depending on chosen software this process is different. Please open expand the section below to find out how to set up the YouTube channel in the Streamster app as an example.
1. Log in to your Youtube account.
2. Click the “Create” – “Go Live” button in the upper right corner of the website
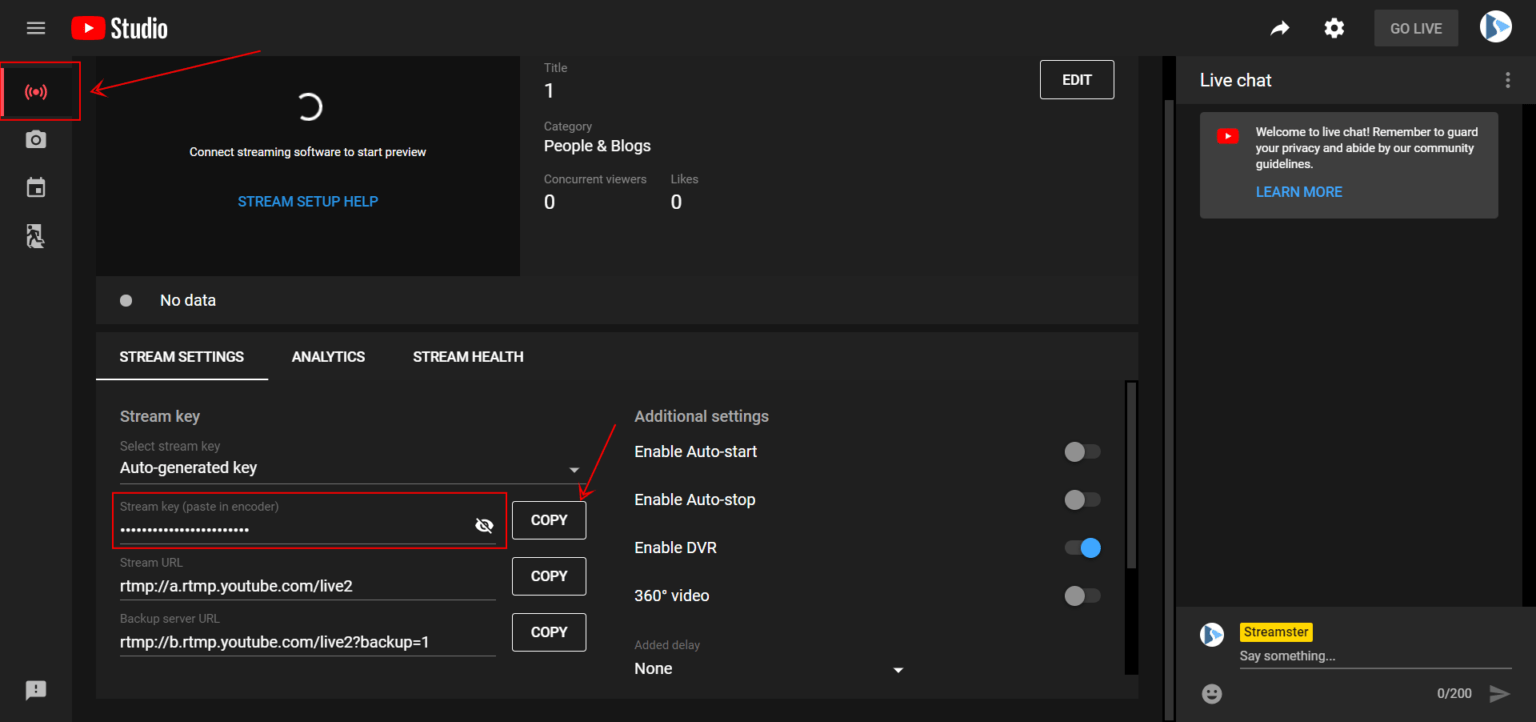
3. Choose the “Stream” tab and copy the “Stream Key” input.
4. Install and launch the Streamster app.
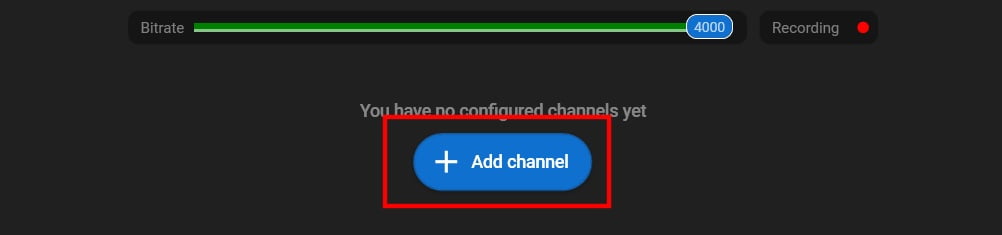
5. Click the “Add channel” button.
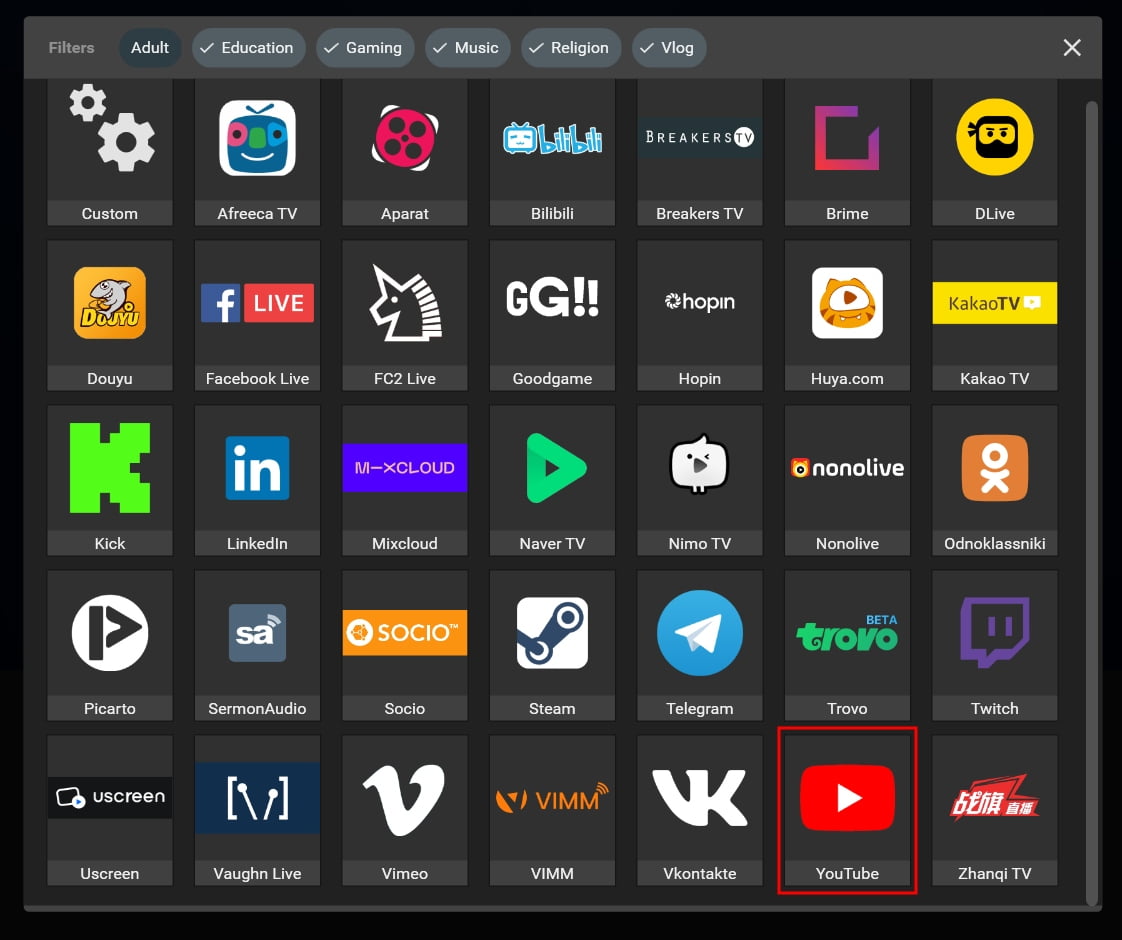
6. Click on the “YouTube” icon in the list of streaming channels.
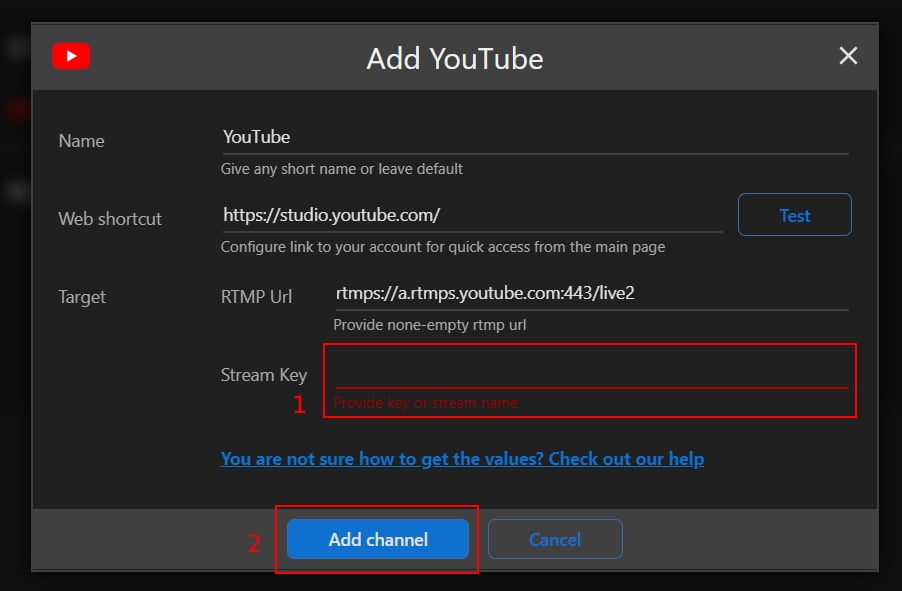
7. Paste your Stream key (1), and click the “Add channel” button (2).
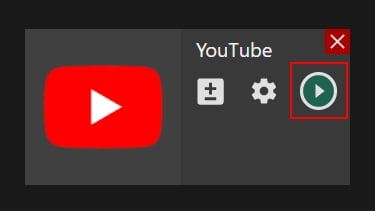
8. Start your live stream on the platform.
2. Configure your stream settings, including the stream quality, bitrate, and audio settings in your streaming software.
3. Set up your stream layout, including any overlays or graphics you want to include.
4. Preview your stream to ensure that everything looks and sounds good.
Step 4: Start Your Stream
Once you have set up your stream, you are ready to start streaming. To start your stream, follow these steps:
1. Open your streaming software and click on the Start button to launch your live stream.
2. Your stream will now be live on YouTube. You can view your stream on your channel page, and your subscribers will receive a notification that you are live.
3. While streaming, you can interact with your audience through the chat function. You can also monitor your stream analytics to see how many viewers you have and how long they are watching.
Step 5: End Your Stream
When you’re ready to end your stream, click the “End Stream” button. Your stream will automatically be saved as a video on your channel for viewers to watch later. Close your streaming software. Your streaming setting will be saved for your next sessions.