How to add the watermark (image overlay) to your live stream
How to add the watermark (image overlay) to your live stream
Adding a watermark to your live stream can provide several important benefits:
1. Branding and recognition: A watermark with your logo, channel name, or branding elements helps to establish your identity and create brand recognition. It serves as a visual reminder for viewers, making them more likely to remember and associate your content with your brand. This can be valuable for building a loyal audience and attracting new viewers.
2. Protection against unauthorized use: A watermark can act as a deterrent against unauthorized use or theft of your content. By prominently displaying your watermark on your live stream, it becomes more difficult for others to claim or repurpose your content without proper permission. It adds a layer of protection to your intellectual property and helps ensure that your content remains associated with your brand.
3. Promotional opportunity: Including a watermark in your live stream offers a promotional opportunity. You can customize the watermark to include your website, social media handles, or any other relevant information that can drive traffic and engagement to your online platforms. It serves as a subtle yet effective way to promote your brand and encourage viewers to explore your other content or follow you on different platforms.
4. Professional appearance: A watermark gives your live stream a more professional and polished look. It shows that you take your content creation seriously and adds a level of professionalism to your overall presentation. This can help you stand out among other streamers and create a positive impression on your viewers.
5. Identification and recognition during shared content: If your live stream includes sharing or re-uploading of your content by others, such as highlights or clips, a watermark helps viewers identify the original source. It ensures that even when your content is shared across different platforms or social media, viewers can still recognize and attribute it to your brand.
When adding a watermark, it’s important to find a balance between visibility and minimal interference with the viewing experience. The watermark should be placed strategically, ensuring it doesn’t obstruct essential elements of the stream while still being noticeable enough to serve its purpose.
A short note about Streamster
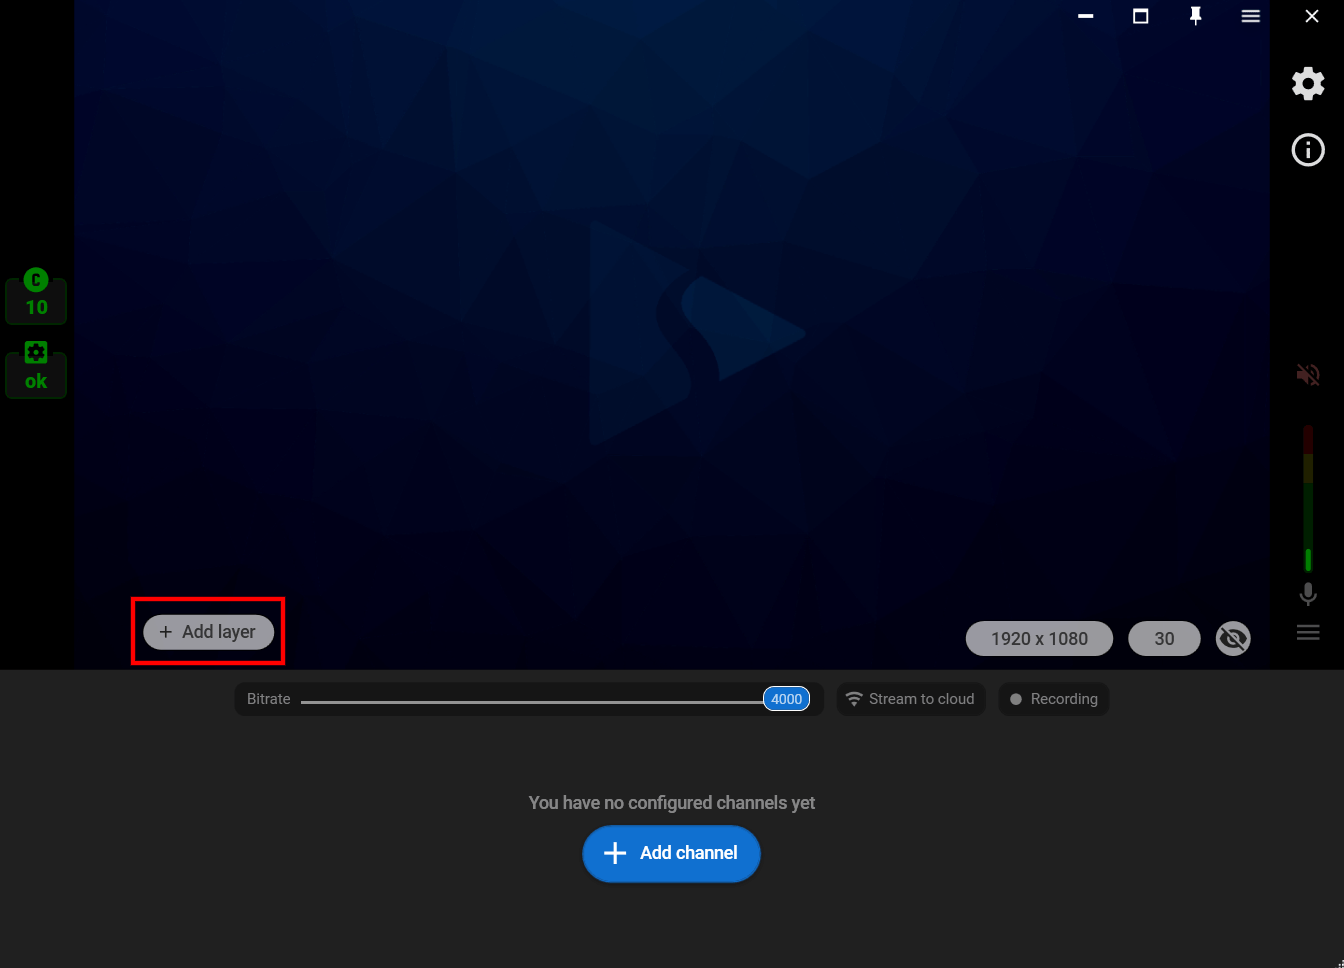
1. Download and launch the Streamster app (creating an account is optional, but it unlocks additional features).
2. Add the first video source by clicking the “Add layer” button and select your video source (your web camera, screen, window, web page, etc.)
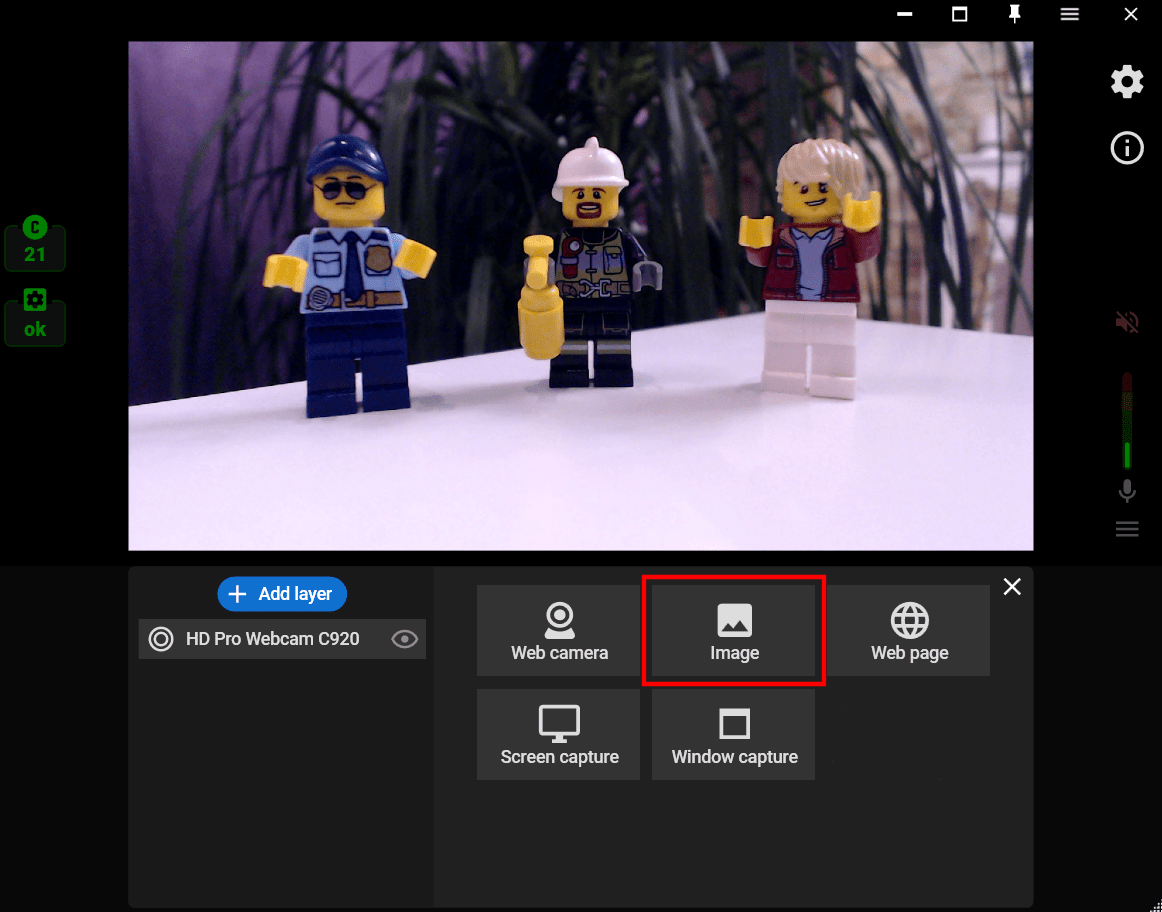
3. Set up your main video source
4. Click the “Add layer” button once again, choose the “Image” source from the list, and choose the needed image from your PC.
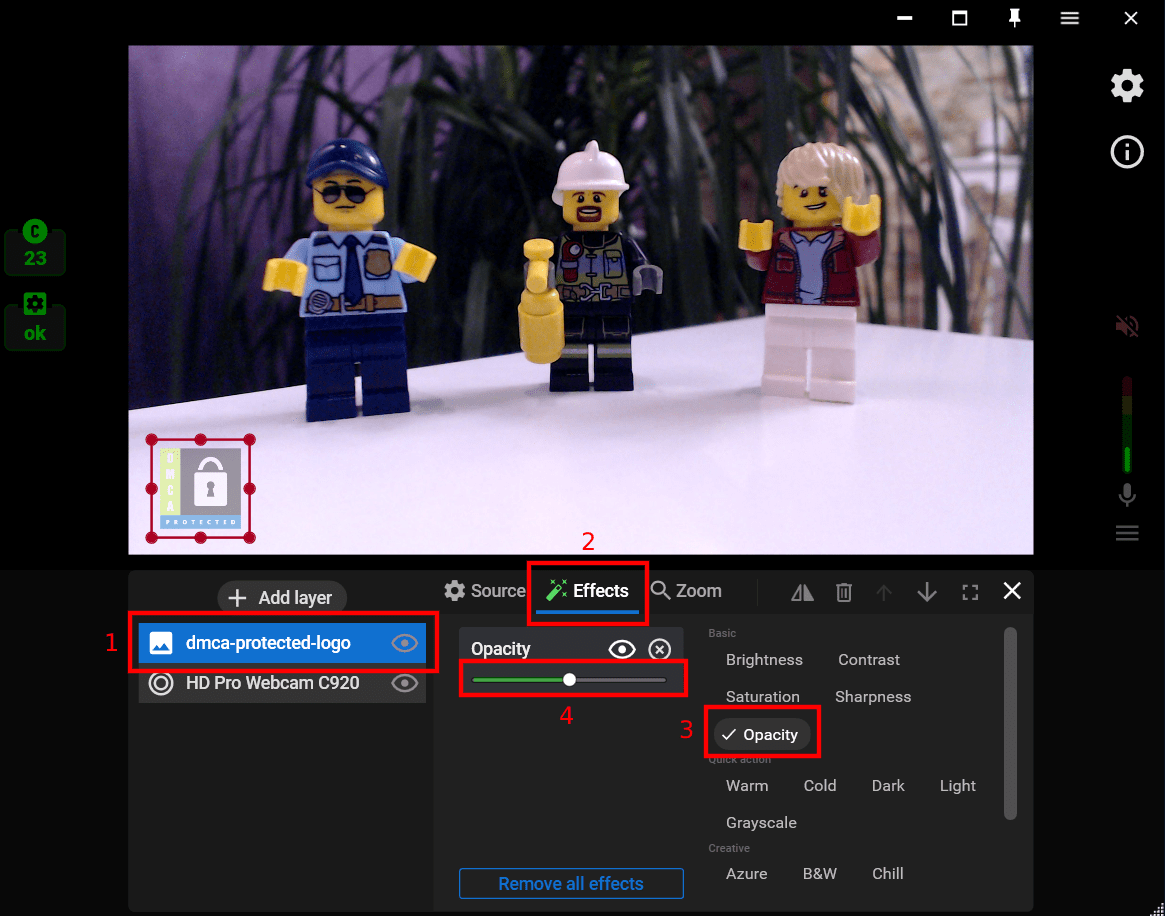
5. Change image position and size with your mouse.
6. If you want to make your watermark transparent, choose the image layer (1), click on the “Effects” tab (2), choose the “Opacity” filter, and change the opacity level (4).
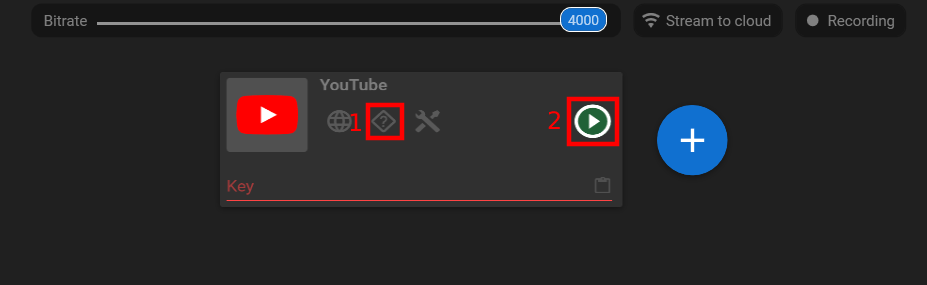
7. Close the layer settings window, click the “Add channel” to set up streaming to one or multiple platforms.

8. Follow the connection instructions (1) and start your stream (2).