How to Stream the Sound From the PC and Microphone Simultaneously
How to Stream the Sound From the PC and Microphone Simultaneously
Using broadcast sound from both your microphone and desktop at the same time during a live stream can have several benefits:
1. Enhanced audio quality: By combining the sound from your microphone and desktop, you can provide a more immersive and professional audio experience for your viewers. This allows them to clearly hear both your voice and any accompanying sounds from your computer, such as game audio, music, or other media.
2. Effective communication: If you’re streaming gameplay or tutorials, it’s essential for your audience to hear your commentary or explanations while also being able to hear the in-game sounds or any relevant audio from your desktop. Balancing the microphone and desktop audio ensures that your viewers receive a well-rounded audio experience and can follow your instructions or discussions effectively.
3. Versatility and flexibility: Streaming with both microphone and desktop audio simultaneously gives you greater flexibility in the type of content you can provide. You can seamlessly switch between speaking directly to your viewers, engaging in conversations or interviews, and showcasing media or gameplay audio without needing to adjust settings during the stream.
4. Immersion and engagement: Immersive audio experiences can significantly enhance viewer engagement. By including desktop audio, such as game sound effects, music, or other ambient sounds, you create a more dynamic and captivating atmosphere for your viewers. This can make the stream more enjoyable and encourage viewers to stay engaged for longer periods.
5. Highlighting interactions: If your live stream involves interactions with other participants, such as co-hosts, guests, or audience members, using broadcast sound from both your microphone and desktop can ensure that all audio inputs are captured. This allows for seamless conversation and ensures that everyone’s voice and contributions are heard clearly by the audience.
It’s important to properly balance the levels of microphone and desktop audio to avoid overwhelming one source or having an imbalance between them. Additionally, consider using noise suppression and audio processing techniques to minimize unwanted background noise and ensure optimal audio clarity throughout the stream.
What is Streamster?
1. Download and launch the Streamster app (creating an account is optional, but it unlocks additional features).
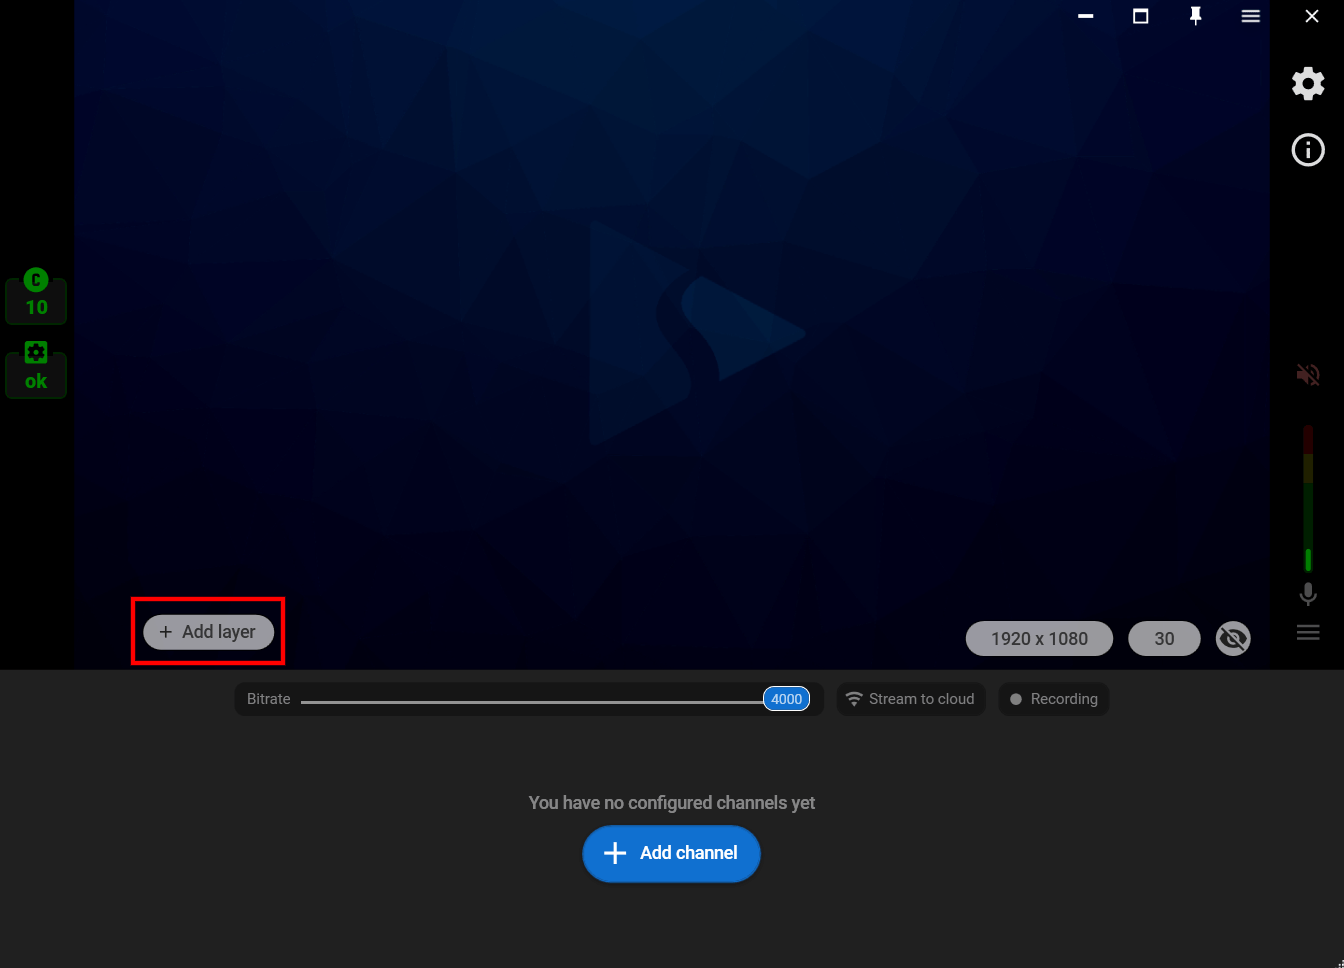
2. Click the “Add layer” button to add your video source. Choose the needed video source (e.g. Web camera). Set all necessary preferences for your video source.
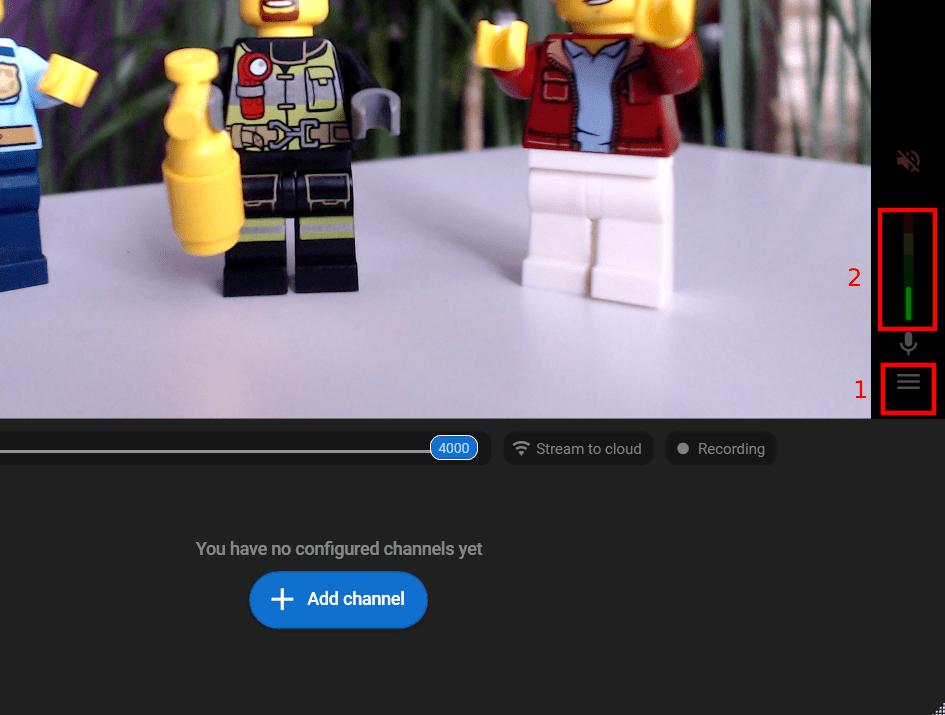
3. Click the “Configure audio source” button (1) to select a microphone if you have a few of them connected. Also set the volume level for your microphone (2).
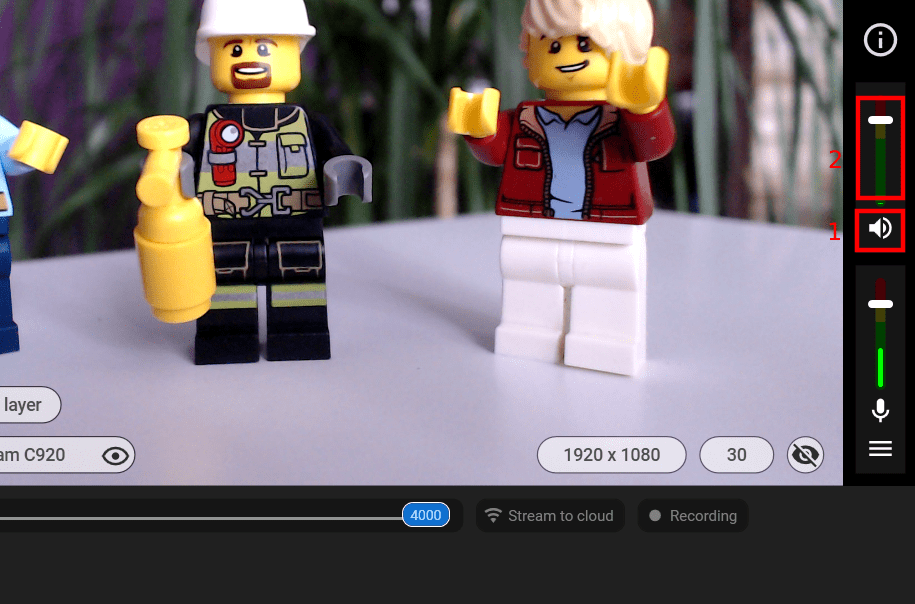
4. Enable your desktop audio (1) and set its volume level (2).
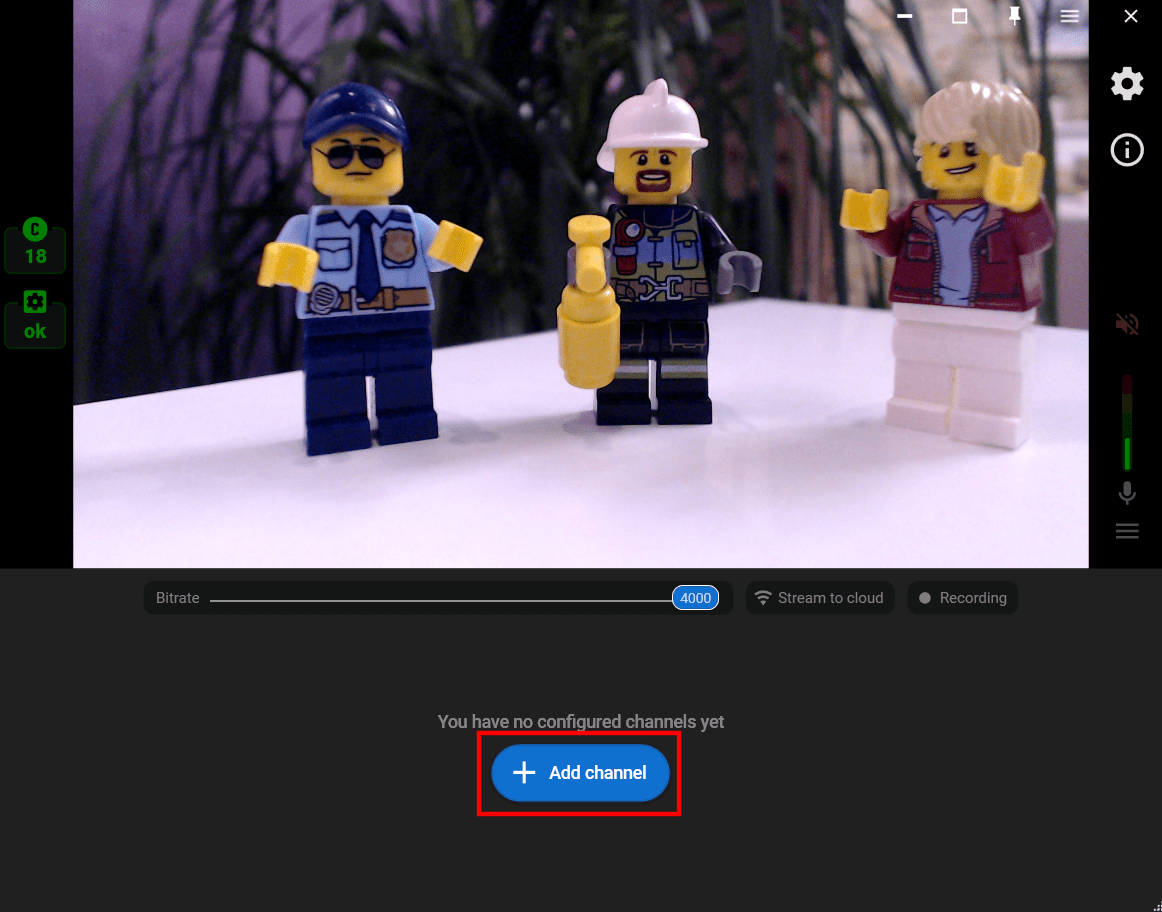
5. Close the layer settings window, click the “Add channel” to set up streaming to one or multiple platforms.
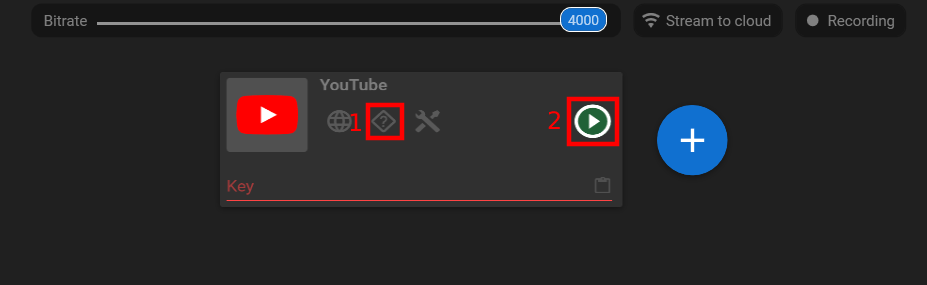
6. Follow the connection instructions (1) and start your stream (2).